
Low cost fermentation cooler
Tue, Aug 13, 2013
As I mine my deprecated blogs and other websites for stuff worth keeping, this one stands out as one of my favorites. It's still a great how-to on building a fermentation cooler to keep your carboys cool in a tight space and on a tight budget. At the time I did this we were in a small apartment and a chest freezer or other more advanced/expensive solution was out of the question. I ended up building several of these ice-cube setups and used them extensively for ales and even a few lagers. I found that checking the temp and adding ice every two days was sufficient to keep reasonably even temp. control. A couple of my lagers that were fermented and lagered in these things won medals (silver and gold) at competition, so I suppose the proof is in the pudding.Anyway, This was originally done in two parts with a third part promised where I'd introduce some crazy, home-made, thermostat-controlled water re-circulator system to regulate the temperature. I never did it. A year or so later we moved out of our little apartment into a house with a proper garage. That's when I did the normal thing and bought a chest freezer and a Johnson Controls digital thermostat. Nonetheless, I still use these things every so often: they're great for ales when I don't feel the need for super tight temp control. They're also great for brewing on the road. After brewing, I load my carboy inside this thing and the wheels help me get it to and from the truck. The cooler and lid helps protect from sun exposure as well.
It's worth noting that this setup will host a 5 or 6gal Better Bottle (plastic) carboy OR a 5gal glass carboy. The 6gal glass carboys I own are too tall and keep the lid from closing.
(Originally Poster on Feb 17 2009)
Living in Florida I'm worried that my brewing season will be limited by the heat of summer, and I assume that I will never be able to brew lagers. Of course, if I can find a way to keep my fermenter cool and regulate temperature I might be able to brew year-round and maybe even do a lager or two. The problem is that I live in a relatively small apartment with no room for a second refrigerator or freezer that would be large enough to convert into a fermentation cooler. So after searching the web for a while I found a howto on converting an igloo "ice cube" cooler to fit a carboy.
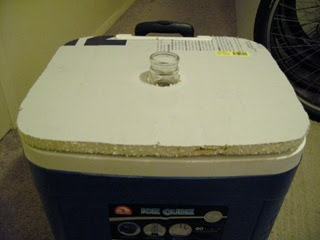
The above article inspired me to conceive of what I hope will be a pretty rad fermentation cooler system that's comprised of mostly multi-use pieces and regulated by a thermostat and will allow me to confidently brew lagers... but that's the big picture. This "phase 1" post is basically about my implementation of the custom foam cooler lid that's discussed in the second post of the above link. Here's a photo of the final result of phase 1 - notice the top of the carboy rising up, out of the cooler to allow for CO2 escape.
Needed parts and tools
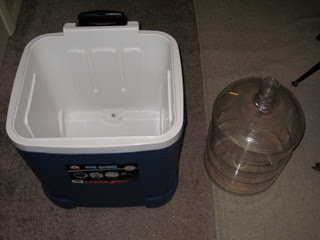
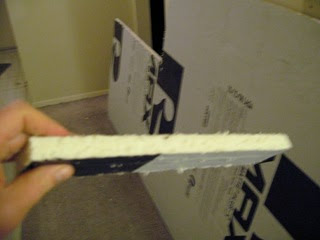
I did this using an Igloo brand cooler called the 'ice cube'. This is a 60 quart cooler that has a tote handle and wheels like you'd see on airport luggage- handy for moving around what will be a very heavy box once filled with a loaded carboy, water, and ice. The ice cube was pretty easy to find- I got mine at Walmart for $30. The other major part is the material to create the custom lid. I used foam insulation that I bought from Lowe's- I bought an 4'x8' piece of "Rmatte Plus" which has an R rating of 5 this cost me $10.The photo on the left is my ice cube with the lid removed (it's simple to pop the hinges free and remove the lid) along side my 6 gallon better bottle carboy. The photo on the right is the foam insulation.
The other tools and materials needed are spray adhesive, knife (I used a hand-held 18 tpi sawzall blade), measuring tape, sharpie, string, a paper clip, and some paper to write your measurements on.

Procedure
The first thing to do is to measure the inside "diameter" of the cooler - my measurements were 16.75" x 14.5" for this. Cut a piece of foam using that measurement. Now take the foam and lay it over the mouth of the cooler- you'll see that you need to round the edges. With the foam sitting on top of the cooler I just eyeballed the rounded edges and used a sharpie to trace the estimated cuts- then cut. Once that's done you might need a couple more refinements of the rounded edges, but you should end up with something that fits pretty snug inside the cooler. This piece will be the final line against heat intrusion.
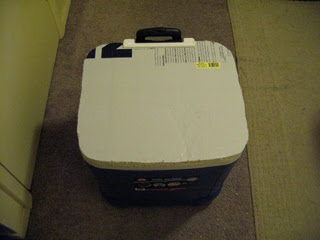
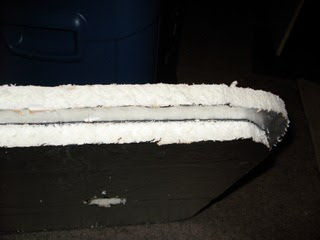
Now you'll want to measure the outside diameter of the cooler to create the larger, outer lip of the lid. My measurements for this were 19" x 17". Again, cut a piece of foam to the rough measurements. Now set it on top of the cooler to get the width of the hinge-box on the backside of the cooler and use the sharpie to mark that width. Now cut a 1" depth rectangle of that width to allow the lid to snug around the hinge-box. Once you can fit around that, put the lid in place, flip the cooler over on the lid and trace the edges of the cooler on the underside of the lid for cutting. Once that's done you should have this:
Now you'll need to set your carboy in the cooler to make some measurements for cutting the holes that will allow the carboy to protrude through the lid. Take measurements of the carboy mouth relative to the inside edges, also get a measurement of the diameter of your carboy mouth.

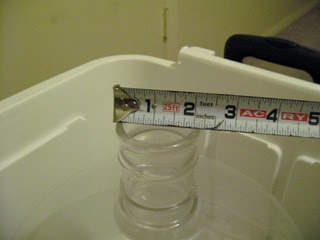
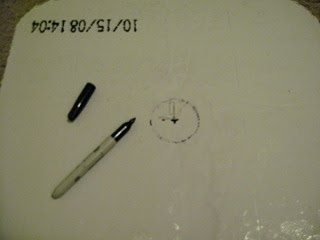
Now apply these measurements to create a hole pattern on the inside lid- stick a paperclip in the center, and use a piece of string measured to the radius of the carboy mouth to trace a circular cut-out pattern:
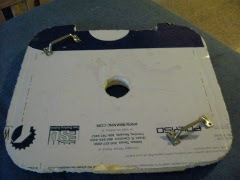
Use the knife to cut out the hole to the best of your ability. Remember to cut small, as you can always increase the size of the hole later. Now go outside- the adhesive spray gets everywhere and is a bitch to get out of fabrics. Lightly insert the inside diameter lid, spray it and the bottom of the outside diameter lid and then stick them together. Once that's done you can cut the hole in the top lid using the hole already cut in the bottom lid. The result should resemble this:
Once the hole is cut through both layers, you should experiment with how the cooler, carboy, and lid all fit together. I found that I needed to make the hole through the inside layer of foam a bit wider to accommodate the widening of the carboy as the mouth expands into the body. Mileage will vary.
Tests and conclusions
After completing this custom lid I decided to test out the temperature retention by adding ~5 gallons of tap water to the carboy and filling the cooler with another 5 gallons of water and all of the ice in my fridge's ice maker. This resulted in an initial temperature of ~51 degrees F (as measured in the water surrounding the carboy withing the cooler). This temperature kept overnight (8 hrs) and rose to 53 degrees in the morning. I suppose this was likely heat dispersion from the water in the carboy to the cooler ice water surrounding it. The following morning I removed about a gallon of the water surrounding the carboy and added a frozen, 1qt plastic bottle of water and some more ice from the freezer. By the time I left for work the temp had dropped to 48 F and after 8 hours of work the temp had dropped further to 46 F. Keep in mind that the ambient temperature in my apartment during this test was pretty consistently 60F, so I'm sure mileage will vary with warmer ambient temps.Due to money and actual need it will probably be awhile before I tackle the next phase of this project. However, it shouldn't be a big deal as I think this simple cooler conversion should suffice for lagering. The problem I see with this setup is that it lacks automatic temperature control and requires removal of the lid to manually add cold... I've got a plan to address these shortcomings and I hope to be able to assemble it later this year.
... that's what 2009 Todd thought, but 2013 Todd has a chest freezer, so never did add that auto temp control, but here what I did do...
Minor, but worthwhile improvement!
(Originally published August 17, 2009)Since my first post on the subject of creating a low cost cooler to manage temperature during fermentation I've made some incremental improvements to the design that I built The main issue is that the initial design for the lid had a tendency to get stuck in the cooler and without handles the act of lifting it up to change ice was a pain. The solution was simple- a couple screen door handles, 4 2-inch 6/32 machine screws, wide fender washers, and wing nuts. Now with the handle on diagonally opposing corner, lifting the lid off is much easier. An additional benefit of the improved design is that the screw running through the lid help to secure the two layers of foam much better than the spray adhesive that I'd used initially.


These photos are:
- one handle assembly (need two for each lid)
- the shiny underside of the lid- you can see the fender washers and wingnuts holding things together
- top of the lid with the handles in opposing corners
Lastly, I've found another adaptation for using these coolers. A single layer foam lid with cutout to accommodate a corny keg makes for a nicely portable keg cooler to take to parties. It keeps the bottom of the keg cold, and that's what really matters!